






Photographing our galaxy, the Milky Way, is one of the most rewarding things you can do with a camera, and it does not require a telescope. With a tripod, a reasonably fast lens and the right conditions, most modern cameras can record far more stars than the eye can see. Here is how to take galaxy photos, step by step.
Plan: Dark Skies, No Moon, Clear Weather
Conditions matter more than equipment.
- Get away from city lights. Light pollution washes out the faint glow of the Milky Way. Drive to the countryside, the mountains or the coast.
- Shoot around the new moon. A bright moon lights up the sky and hides the stars.
- Check the forecast. You need a clear, cloudless night.
- Know where to look. The bright core of the Milky Way is visible in the Northern Hemisphere from roughly spring to early autumn. A planetarium or stargazing app will show you where and when it rises.
The Gear You Need
- A camera with good low-light performance. You need manual controls and clean results at high ISO. A camera with a larger sensor has an advantage, but it is not essential.
- A fast wide-angle lens. A wide-angle lens captures a large part of the sky and allows longer exposures before the stars begin to trail. A wide maximum aperture, f/2.8 or faster, lets in more light.
- A sturdy tripod. Exposures last many seconds, so the camera must be completely still.
- A remote shutter release or the camera’s self-timer, to avoid shaking the camera when you press the button.
- Spare batteries and a torch. Long exposures and cold nights drain batteries. A red light preserves your night vision.
Camera Settings for Galaxy Photos
Switch to manual mode and shoot in RAW, which gives you much more room to adjust the image later. Then use these settings as a starting point:
- Aperture: the widest your lens offers, for example f/2.8.
- Shutter speed: about 15 to 25 seconds with a wide-angle lens.
- ISO: high, typically between 1600 and 6400. Start around 3200 and adjust.
- White balance: set it manually rather than leaving it on auto; you can fine-tune it when editing the RAW file.
The 500 rule
Because the Earth rotates, stars turn into short streaks if the exposure is too long. A common guideline is to divide 500 by the focal length of your lens, in full-frame terms, to get the longest exposure in seconds. With a 20mm lens that is about 25 seconds. On high-resolution cameras, use a shorter time for sharper stars.
Focus Manually on a Star
Autofocus does not work reliably in the dark. Switch to manual focus, turn on live view, magnify the view on a bright star or a distant light, and turn the focus ring slowly until the star is as small and sharp as possible. Take a test shot and zoom in to check. Do not trust the infinity mark on the lens.
Compose With a Foreground
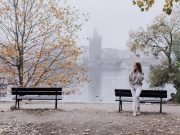
A photo of stars alone is rarely as strong as one with something on the ground: a tree, a mountain ridge, a ruin, a lighthouse or a person. Arrive before dark to find your composition, and keep the horizon level.
Take Multiple Exposures and Stack Them
High ISO means noise. To reduce it, take a series of identical exposures of the same scene and combine them with stacking software. Averaging many frames lowers the noise and brings out more detail and colour in the galaxy.
Photographing Other Galaxies
The Andromeda Galaxy can be photographed with an ordinary camera and a telephoto lens, but faint, distant objects need much longer total exposure. For that you need a star tracker, a motorised mount that follows the rotation of the sky, together with many stacked exposures.
Editing
RAW files of the night sky look flat at first. In editing, adjust the white balance, raise the contrast, lift the shadows carefully and apply noise reduction. Keep it natural; it is easy to overdo.
Do not be afraid to experiment with different exposures, ISO settings and apertures to see what works best for your setup. With some trial and error, you will be able to capture stunning photos of the galaxy.