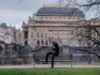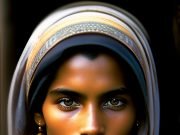

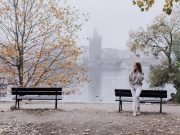







An overexposed photo has received too much light; an underexposed photo has received too little. Both lose information, but they lose it in different places and with different consequences. Being able to recognise each one quickly, and knowing which is easier to repair, saves many pictures.
What each one looks like
| Overexposure | Underexposure | |
|---|---|---|
| Overall look | Pale, washed out | Dark, murky |
| Where detail is lost | Highlights: sky, white clothing, skin in sun | Shadows: dark hair, dark clothing, interiors |
| Colour | Faded; bright areas turn pure white | Dull; dark areas turn pure black |
| Histogram | Pushed against the right edge | Pushed against the left edge |
| Recovery in editing | Clipped areas cannot be restored | Often possible, but adds noise |
Clipping
A sensor can only record a limited range of brightness. Anything brighter than its upper limit is recorded as pure white with no detail; this is called clipped or “blown” highlights. Anything darker than its lower limit becomes pure black, known as blocked or “crushed” shadows.
The two are not equally serious. A clipped highlight contains no data at all, so no amount of editing will bring back the texture of a white wedding dress or the clouds in a blank sky. Dark shadows usually still contain some data. Brightening them reveals detail, along with noise. For this reason digital photographers generally protect the highlights first.
Reading the histogram
The histogram is a graph of the tones in a photo. The left side represents dark tones, the right side bright tones, and the height shows how much of the picture has each tone. It is more reliable than the image on the rear screen, which looks different in sunlight and in a dark room.
- A graph touching the right edge with a tall spike means highlights are clipped.
- A graph piled against the left edge with empty space on the right suggests underexposure.
- There is no single ideal shape. A snow scene sits naturally to the right and a night scene to the left.
Most cameras also offer a highlight warning, in which clipped areas blink during playback. Zebra stripes do the same job in the viewfinder of many mirrorless cameras. Turn one of these on.
How to correct each one
If the photo is too bright
- In Aperture or Shutter Priority, set exposure compensation to −1 and reshoot.
- In Manual, use a faster shutter speed, a smaller aperture or a lower ISO.
- Example: f/4, 1/125 s, ISO 400 is one stop too bright. Change to 1/250 s.
If the photo is too dark
- Set exposure compensation to +1 and reshoot.
- In Manual, use a slower shutter speed, a wider aperture or a higher ISO.
- Example: f/8, 1/250 s, ISO 100 is two stops too dark. Change to f/5.6 and ISO 200.
Scenes that fool the camera
- Snow, beach, white walls: the camera darkens them towards grey. Add +1 to +2 compensation.
- Dark stage, black clothing, night scenes: the camera brightens them. Use −1 to −2.
- Subject against a bright window or sky: the subject becomes a silhouette. Add +1 to +2, accepting that the background will blow out, or add light to the subject.
High contrast scenes
Sometimes the difference between the brightest and darkest parts is greater than the sensor can record in one frame. Then something must be sacrificed. Shooting RAW gives more room to recover both ends. Bracketing, which means taking the same frame at 0, −2 and +2 stops, gives a choice later or allows the frames to be combined.
Exposure as a choice
A technically correct exposure is not always the best one. A deliberately bright “high key” portrait feels light and airy. A deliberately dark “low key” image feels dramatic. A silhouette is underexposure used on purpose. The aim is control: the photo should be as bright as you intended.
Common mistakes
- Trusting the rear screen, especially with its brightness turned up.
- Assuming everything can be fixed later. Blown highlights cannot.
- Leaving exposure compensation set from an earlier scene.
- Underexposing heavily “to be safe” and then fighting noise in the shadows.
- Shooting only JPEG in difficult light, which leaves much less room for correction.
Practice exercise
- Choose a scene with bright and dark areas, such as a room with a window. Turn on the histogram and the highlight warning.
- In Aperture Priority, take five frames at −2, −1, 0, +1 and +2 exposure compensation.
- Study the histogram for each and note where clipping begins at both ends.
- If you shoot RAW, try to recover the −2 and +2 frames in editing and compare what comes back.
Next in this series: How to Read a Camera Light Meter, How to Balance ISO, Aperture and Shutter Speed and How ISO Affects Image Noise. You can also browse all photography lessons.